How to Make Your Home Accessible After a Sudden Injury

A sudden injury can turn your world upside down, making everyday tasks feel like monumental challenges. Often, these life-altering events stem from incidents like vehicle accidents; in Florida alone, there were over 391,000 crashes in a single recent year, resulting in more than 250,000 injuries. When you return from the hospital, the last thing you need is a home that’s difficult to navigate. The good news is you don’t need a major renovation to reclaim your independence. This guide will walk you through simple, quick DIY projects you can tackle to make your home accessible, creating a safe and supportive environment for your recovery.
The First 24 Hours: Immediate Steps for a Safer Home
Your first day back home is critical for setting up a safe recovery space. Before you dive into specific projects, focus on making the entire home navigable. This initial sweep addresses the most common hazards and lays the groundwork for more specific modifications. Taking these immediate actions can prevent secondary injuries and reduce the stress of re-acclimating to your environment after a significant physical setback.
Create Clear and Safe Pathways
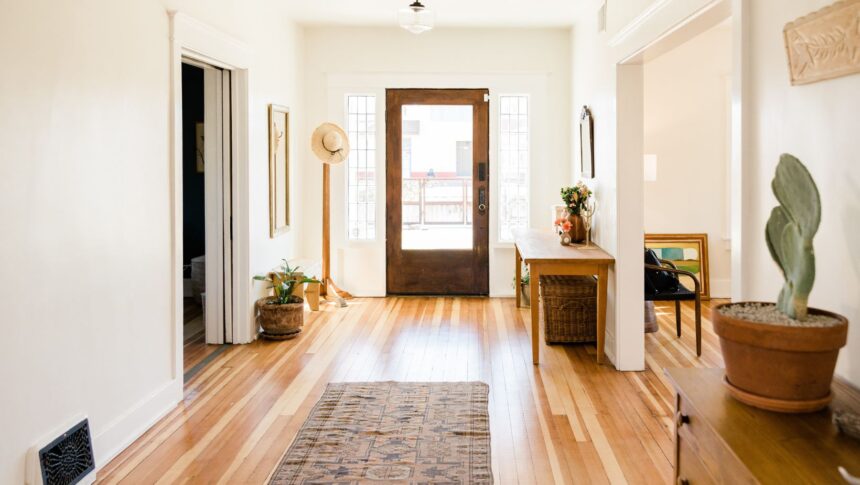
Your ability to move freely without fear of tripping is the top priority. Limited mobility, whether on crutches or in a wheelchair, requires wider, clearer paths than you’re used to. Start by walking through your home and removing any clutter from the floors, especially in high-traffic areas like hallways and entryways. According to the Australian Institute of Health and Welfare, falls from slipping or tripping are a leading cause of injury hospitalizations, making floor-level changes a highly effective prevention strategy. Securely fasten or completely remove all loose rugs and runners; use double-sided tape or non-slip mats underneath any rugs you decide to keep. Rearrange furniture to create pathways at least 32-36 inches wide, which is the standard recommendation for wheelchair accessibility.
Assess Your Needs and The Aftermath
Recovering from a serious injury involves more than just physical healing. The financial and legal stress can be overwhelming, especially after a vehicle collision, an event that carries an annual economic cost of $340 billion in the U.S. While you focus on adapting your home, it’s also important to understand your rights and options. Finding the best car accident law firm can help you manage the complexities of insurance claims and potential legal action, allowing you to concentrate on what matters most: your recovery. This support system is just as crucial as the physical changes you make to your environment, especially since studies show that accident victims who hire a lawyer receive settlements 3.5 times larger on average.
The Bathroom: Your Top Priority for Accessibility
The bathroom is often the most hazardous room in the house due to its tight spaces and slippery surfaces. Making it safer is a non-negotiable first project. A recent report from the University of Stirling highlighted that people unable to access home adaptations like grab rails are more prone to falls and injuries. Prioritizing this space provides an immediate boost to your safety and confidence, addressing one of the most common areas for in-home accidents and allowing for greater personal independence during a vulnerable time.
How to Install Grab Bars for Rock-Solid Support
Grab bars aren’t just for the elderly; they provide crucial stability for anyone with balance or strength issues. Installing them correctly is essential for safety, as they must be able to support your full body weight during transitions. Follow these steps for a secure installation.

- Identify Prime Locations: The best spots are next to the toilet and inside the shower or tub area—anywhere you need to sit, stand, or transition.
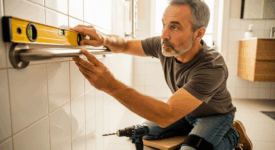
- Locate the Studs: Use a stud finder to locate the wooden studs in the wall. Grab bars must be anchored into studs to support your weight. Never mount them only into drywall. Mark the stud locations with a pencil.
- Position and Mark the Bar: Hold the grab bar against the wall over the marked studs at a comfortable height. Use a level to ensure it’s straight, then mark the screw holes.
- Drill Pilot Holes: Drill pilot holes into the stud at your marked locations. This makes it easier to drive the screws in and prevents the wood from splitting.
- Secure the Bar: Fasten the grab bar to the wall using the long, heavy-duty screws provided with the kit. Tug on it firmly from multiple angles to ensure it’s completely secure before use.
Quick Upgrades for the Shower and Toilet
Beyond grab bars, a few inexpensive items can dramatically improve bathroom safety. A raised toilet seat with handles reduces the distance you need to lower yourself, minimizing strain on your legs and back. In the shower, a sturdy shower chair provides a stable place to sit while washing, which is essential if standing for long periods is difficult or unsafe. Pairing a shower chair with a handheld shower head makes it significantly easier to bathe thoroughly and independently while seated, giving you full control without risky movements.
Adapting Your Kitchen and Living Spaces for Independence
Regaining independence in your daily routines is a huge part of recovery. Simple changes in the kitchen and living room can help you prepare a meal, relax comfortably, and feel more in control. This is especially true for those facing long recoveries, like the family of a U.S. Forest Service firefighter who is remodeling their home to be ADA accessible after he sustained a severe injury in the line of duty. These modifications are not just about convenience; they are about restoring normalcy and autonomy to your life.
Reorganize Everything Within Arm’s Reach
The principle here is simple: if you use it often, it should be easy to get to without bending, stretching, or reaching. In the kitchen, this means moving frequently used dishes, pots, pans, and food items from high cabinets to lower, open shelves or directly onto the countertop. In the living room, make sure remote controls, books, medications, and your phone are on an easily accessible side table next to your primary seating area. You might also consider using a rolling utility cart to transport items like a meal or a laptop from the kitchen to another room, which reduces the need to carry things while using a mobility aid like crutches or a walker.
A Comparison of Helpful Accessibility Tools
Several simple tools can make a huge difference in your daily life. Here’s a look at some of the most effective and affordable options for your main living areas, which can be purchased online or at most pharmacies and home goods stores. These gadgets are designed to bridge the gap between your current ability and the tasks you need to perform.
| Tool | Photo | Pros | Cons | Average Price |
|---|---|---|---|---|
| Reacher/Grabber Tool | [Image of a reacher/grabber tool] | – Lightweight and easy to use – Extends reach by 2-3 feet – Inexpensive | – Can’t lift heavy items – Requires some grip strength | $10 – $25 |
| Rolling Utility Cart | [Image of a small rolling utility cart] | – Transports multiple items at once – Can double as a mobile side table – Sturdy and reliable | – Requires clear, wide pathways – Can be bulky to store | $30 – $75 |
| Bedside/Sofa Caddy | [Image of a fabric caddy hanging off a sofa arm] | – Keeps essentials organized and close – Prevents items from falling – Easy to install | – Limited storage capacity – May not fit all furniture styles | $15 – $30 |
Making Your Bedroom a Sanctuary for Healing
Your bedroom should be a place of rest and recovery, not another obstacle course. The primary goal is to minimize risks and maximize comfort, ensuring you can rest without interruption or anxiety. Small adjustments can make it significantly safer and more comfortable, turning it into a true space for healing. These changes will support both your physical recovery and your mental well-being during a challenging time.
- Ensure a clear path from the doorway to your bed and to the bathroom. This is critical for preventing falls during the night when you may be groggy.
- Add a lamp or nightlight within easy reach of your bed to illuminate any nighttime trips, reducing the risk of tripping over unseen objects.
- If you need to create a temporary ramp for a raised threshold, it can be a simple DIY project and is one of the most effective exterior home upgrades you can make for accessibility.
- Ultimately, your goal is to focus on creating a comfortable and safe haven where your body and mind can heal properly.
Take Back Your Independence, One Step at a Time
Adapting your home after an injury can feel like another burden, but these practical, high-impact changes are well within your reach. By clearing pathways, securing your bathroom, and reorganizing your living spaces, you’re not just making your home safer—you’re rebuilding your independence and creating an environment that supports your healing journey. Do not feel pressured to do everything at once. Start with one project today. Each small modification is a powerful step forward on your road to recovery.


