Can You Spackle Over Paint?
Maintaining your house walls can be difficult but that’s the only way you can save thousands of dollars per year.
Since paint jobs for a house can cost anywhere around $3000-$5000, you have to keep the walls tidy and neat through DIY.
Now if you’ve been there, you must know how tiring a paint job can be, plus it takes weeks to complete.
So if you can’t do that on your own or afford professional help, then there is one trick that might help you with the walls.
No matter how hard you try you cannot save those good old walls from dents and blemishes, so rather than fixing them, why not just hide them.
The best way to do so is by spackling. And here comes the main question;
Can you spackle over paint?
Let’s find out together.
Can You Spackle Over Paint?
After you finish painting the drywall and applying the final color coat, you may still notice some holes and cracks, uneven seams, dents, and similar blemishes.
Luckily, it’s possible to spackle over paint and fix these imperfections. However, you will have to do some preparatory work.
You can’t spackle over the paint right away. It’s necessary to wait at least 24 hours for the paint to dry off.
To know the entire procedure, head below and read this guide.
How To Spackle Over Paint?
For people questioning; ‘can you spackle over paint?’. Yes, you can, but only if you do it right.
If you don’t know how to spackle over paint, you might end up ruining that dent on the wall into something worse.
Although it is not something technical, you still need to follow the basics to get a job well done.
So below, I have mentioned a few steps that can get you a spot-free and dent-free wall. Head below and check them out.
Step 1 – Prep The Wall
The first step in our episode of ‘can you spackle over paint?’ involves prepping the wall. Now, most of the time you will have a smooth canvas to work on.
However, sometimes you can find nails stuck into the wall that get recognized at the time of scraping and sanding.
For this reason, remove all sorts of nails with a pincer and clean your wall with a putty knife.
The putty knife required for this procedure should be in size 8, 9 or 10. Also, look out for any camouflaged pieces of paper or tape that could go unnoticed.
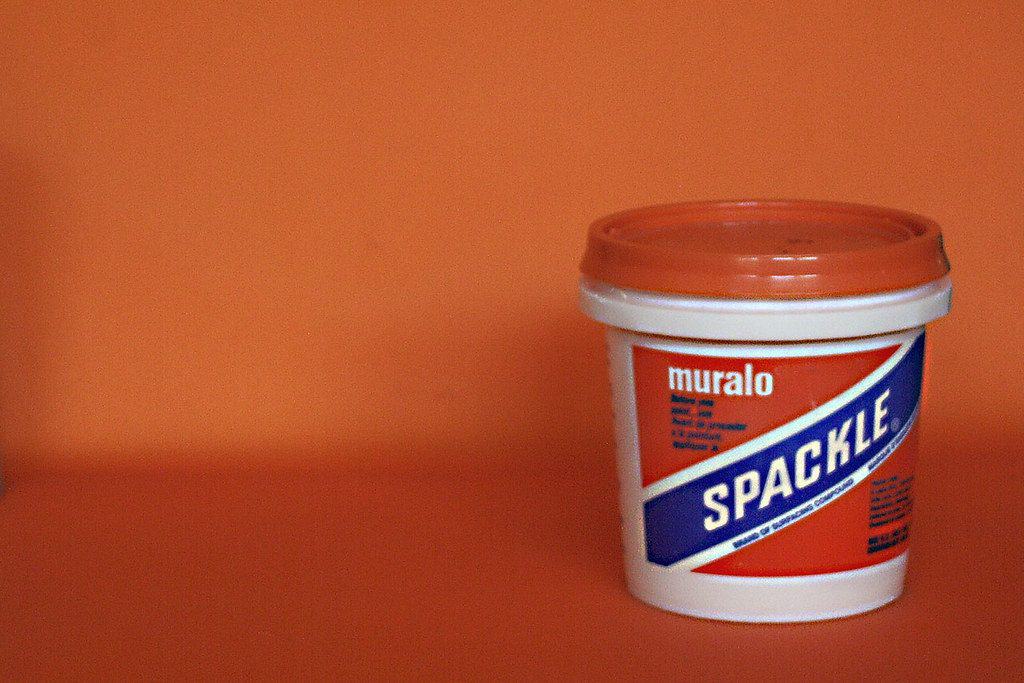
Step 2 – Prepare The Spackle
The next step is to prepare the spackle. Preparing a spackle mix is super easy, just combine spackle mix and water.
But if you mess up with the quantity, your wall might need expert supervision. So here’s how you prepare spackle in the right quantity.
If you’re using spackle paste, add two to four scoops of the paste to a bucket and gradually pour one glass of water into it.
Don’t forget to mix it between intervals.
Similarly, if you’re using spackle powder, add two scoops of powder and combine with half a glass of water.
Remember you’re looking for a putty consistency, like a super thick cake batter.
Step 3 – Apply The Spackle
After you’ve prepped the wall and the spackling compound, all that is left is to apply it.
Take out a little amount of spackle from the bucket and close it so that it doesn’t dry out.
Using a steel spatula, coat the cracks or holes with the spackle. Try to feather the spackle as smoothly as possible at a 45-degree angle.
Also, don’t overcoat it, otherwise, the spackle will get prominent instead of hiding the imperfections.
Once you’re done with that, scrape off the excess using the same spatula at a 90-degree angle and let it dry.
And that’s how you spackle over paint.
Step 4 – Sand The Spackle
That’s not it fellas!
The spackle will take a few hours to dry and after that, you have to sand the spackle. But first, apply a second coat in the same directions mentioned above and let it dry.
Now use a sander, a sanding block, or a wood sander to sand the spackle. This process might scrape off the overcoat but it’s completely fine.
After sanding, your spackle will turn into a faded shade and it will look smooth. On touching, you will find it sandy yet smooth.
That’s the texture you’re looking for.
Step 5 – Finish Off With Paint
The last step is to add the final touches with paint. But before that, clean the wall one last time to ensure there are no hard bits or dried spackle left on the surface.
Use a dampened cloth and wipe away any leftover debris. The sandy texture will also fade away as you wipe and pat dry the wall.
After that, apply a layer (or as many as you like) of paint.
Make sure to get the exact shade of paint that you’ve used on the rest of the wall so that the spackled area doesn’t get highlighted.
How To Choose The Right Spackle Compound?
The technique is not everything when it comes to DIY house jobs. You have to be particular about the product you’re buying and it’s quality.
When talking of spackle compounds, you must look for the following types of spackles depending on your need.
Epoxy
Epoxy spackle is considered one of the most durable spackles, however, it can be hard to use.
It is an oil-based compound which makes it much more suitable for spackling over paint.
Since it is oil-based, you will not find any trace of water in the formula and that makes it water-resistant.
All you have to do is mix the epoxy resin with the epoxy hardener in the ratios mentioned in the package.
Apply over the paint in the same way as normal spackle.
Acrylic
Epoxy might be durable but it’s not suitable for bigger holes. Acrylic is considered an ideal spackle for larger holes as it is flexible.
Plus, it doesn’t dry up as normal spackle and can be applied in layers to cover approximately ¾ inch of a hole’s depth.
You can use it on drywall, brick, stone, wood, and even regular cement walls.
Acrylic spackle comes in a pre-mixed formula which is ready to be applied as soon as the seal opens. It spreads super easily and smoothly.
Vinyl
Vinyl spackle is the general spackle we have discussed in this guide. The regular spackle usually dries within minutes and doesn’t require any extra layers.
However, vinyl spackle takes its time to dry properly and has to be applied in coats. It is best for filling in deeper cracks and holes, where the epoxy spackle cannot help.
The only additional work you’ll have to do after applying vinyl spackle is priming and painting the surface.
This is necessary because vinyl spackle becomes quite prominent if not hidden with paint.
For the primer, you can use any water-based or drywall primer, nothing special.
Lightweight Compound
If your wall has a lot of small holes, dents, or cracks, then neither of the above spackles is going to help.
Lightweight compound spackle is ideal for this job.
Its dries quickly after application and shrink a bit, and it requires a single coat. Light sanding also does the job for finishing.
This method is used before painting a wall, but you can use it on an already painted wall as well.
Just follow my technique and you’ll get the perfect painted wall (without any dents).
Standard Compound
Standard compound spackle is quite the opposite of the lightweight compound spackle.
Unlike the lightweight spackle, this is suitable for deep holes, and critical damages to the wall.
It takes time to dry and the finish is a bit hard, which means sanding is compulsory. However, it is ideal for drywall and can withstand more than any other spackle.
Frequently Asked Questions
Below are some of the most common questions with their answers and tips.
Q: How long does it take for the spackle to come off?
A: Spackle does not come off. If you’ve invested in a decent spackle compound, it won’t come off until scraped or sanded vigorously.
Q: What to do if the spackle in the jar has dried up?
A: You can easily recover dried-up regular spackle by mixing in a lot of water.
Mix the lumps consistently and microwave between intervals. When it reaches the right consistency, you can stop the process.
Q: What type of paint works better over spackle?
A: Matte paint works better over spackle as it combines with the sandy texture. Glossy paint over spackle is a bad choice as it highlights the spackle spots.
But at the end of the day, you should go for the similar paint you had used on the rest of the wall.
Conclusion
And that ends the detailed answer to your QOTD; can you spackle over paint?
Hopefully, this guide has given you enough idea about spackling and its necessity for cracked walls. If you follow the steps mentioned above, you’re surely going to ace the job.
Following the golden rules of spackling, you can fill in cracked floors and furniture as well. It might sound odd, but it is a tried and tested formula, and nobody will know.
So the next time you’re in the need of any wall repair services, audit the situation and consider spackle.
It works like magic on walls!