3 Cheap Ways To Cover Popcorn Ceiling
Many homes from the previous century, especially those built between the 1950s and 1980s, feature a popcorn ceiling.
The textured finish resembling cottage cheese was time-effective, budget-friendly, hid the imperfections, and provided excellent acoustic insulation. Therefore, it’s understandable why this type of ceiling was so popular at the time.
Nevertheless, in the 1990s, popcorn ceilings’ popularity decreased dramatically, for several reasons.
First of all, they contained asbestos which was later found to be a serious health risk.
Plus, popcorn ceilings poorly reflected the natural light, discolored over time, and trapped an enormous amount of dust particles in their bumps.
In addition, the interior design trends moved towards more smooth and clean-lined textures.
Finally, all these factors put together can significantly reduce a home’s resale value.
So for many homeowners, particularly when moving into a new home, finding a cheap way to cover popcorn ceiling is a priority.
Cheap Ways To Cover Popcorn Ceiling

While the first instinct when dealing with a popcorn ceiling is to simply scrape it off, this isn’t necessarily the best idea.
Removing a popcorn ceiling usually takes a lot of time and effort, and can cost quite a lot.
Plus, when you’re done scraping and removing the popcorn finish, you have to deal with the big mess left behind.
Not to mention that, if the house in question is a bit older, you may risk inhaling dangerous asbestos and causing damage to your lungs.
In most cases, hiding the popcorn ceiling is much more practical and cost-effective.
There are several ways to do it and some may require professional help and a decent budget to do it. Others can be done as DIY projects.
We’ll look into the latter and focus on finding a cheap way to cover popcorn ceiling that can still provide an effective and durable solution.
Covering A Popcorn Ceiling With Wood Planks
One of the easiest ways to hide the popcorn ceiling is by covering it with wood planks. It’s also fast, fairly cheap, and requires only a couple of basic tools.
Most likely, you’ll be able to find everything you need in your nearest hardware store.
Plus, this option provides a highly-customizable cover that you can stain or paint to suit your taste and match the rest of the room decor.
On top of all this, the natural look of wood is timeless and will only add to the overall charm of the space, especially in homes with rustic aesthetics.
The whole process of covering a ceiling with wooden planks can be done in a few simple steps which I’ll explain below.
1. Choosing The Wood Planks
Of course, the first step is deciding on the wood you would prefer to use.
Even though it may be a bit more expensive, it’s a good idea to use tongue-and-groove planks as they’re much easier to install and will provide a cleaner look and more secure ceiling.
2. Locating The Rafters And Marking Ceiling Joists
Using a stud finder or by simply probing with nails, you should be able to easily locate the ceiling joists.
Once you situate them, mark them using a chalk line, marker pen, or tape.
3. Cutting And Installing The Wood Planks
Once you’re done with this, mark the wood planks and cut them to size. Remember to leave a 0.25-inch gap on each size to allow for expansion.
Also, if you have light fixtures or vents on the ceiling, create holes for them on wood planks.
To install the planks, nail them down to the popcorn ceiling. Make sure that the nails or screws are long enough to anchor the wood to joists.
If you’re using tongue-and-groove planks, make sure that they’re securely locked in place and that they fit together properly.
4. Adding Finishing Touches
You can stain or paint the wood planks before you apply them to the ceiling, but it’s probably better if you do it after you’ve installed them.
To make sure the new ceiling is properly protected and durable, first, use wood filler to fill out any holes on the planks.
Then, lightly sand the wood and apply a single coat of primer. Finally, get creative and paint or finish the ceiling in your preferred tone.
5. Adding The Ceiling Trim
The final stage is installing trim to cover the remaining gaps. For trim, it’s best to use 0.5-inch thick strips of plywood.
Any potential cracks around the edges should be caulked to ensure a clean look before finishing plywood strips with primer and paint.
Covering A Popcorn Ceiling With Drywall Boards
Covering your popcorn ceiling with drywall panels is a relatively inexpensive and very practical solution.
Drywall provides a smooth and flat surface for you to paint on and, at the same time, leaves enough space for new plumbing or electric lines through the ceiling if those are needed.
This is probably the easiest way to redesign your whole ceiling and rearrange lighting fixtures or ceiling fans.
However, remember that covering a popcorn ceiling with drywall can be a fairly extensive and time-consuming process and usually requires at least some help.
Plus, it will obviously lower the ceiling, so it may not be the best option for homes where the ceiling is already rather low.
The entire process takes a few steps. I’ll explain each of them below.
1. Finding Ceiling Joists And Measuring The Room
Similar to what I explained in the previous section, locate ceiling joists using a stud finder and mark each of them.
Once you’ve identified and marked the joists, measure the width of the room and divide it by the width of the drywall panel to calculate how many panels you’ll need.
2. Extend The Electric Boxes
The popcorn ceiling you’re covering may have lighting fixtures or ceiling fans.
In this case, make sure to extend the electric junction boxes to accommodate for the extra thickness the ceiling will have once you install drywall.
Before you do this, shut down the power, and temporarily remove the fixture or the fan. Then, simply secure a mud ring to each electric box using a screwdriver and screws.
3. Measure And Cut Drywall Sheets To Size
Measure how much distance there is from the wall to the center of the joists you’ve previously marked.
Remember to take expansion into account, so subtract a quarter of an inch from this measurement.
Once you have your measurements, cut the drywall sheets accordingly. To make the installation easier, cut off the tapered edges of the drywall panels.
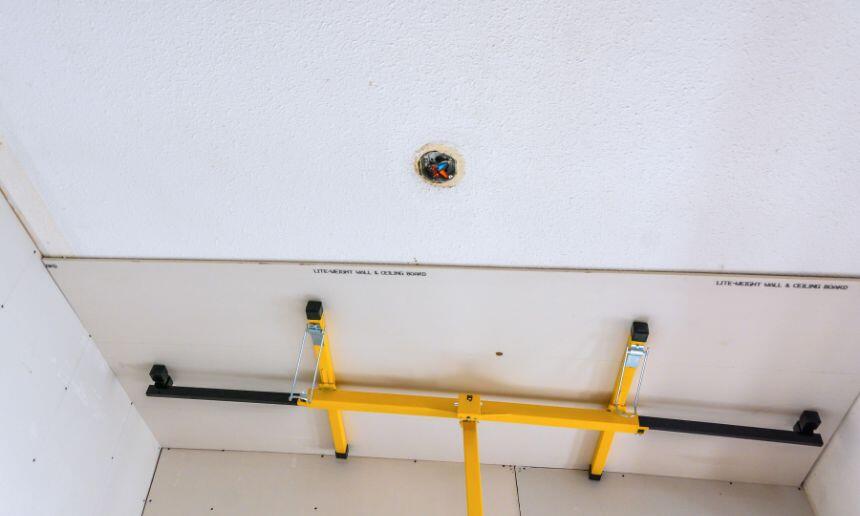
4. Installing The Drywall
When you finish measuring and cutting drywall sheets, it’s time to hand them to the ceiling.
Start along the longest wall, lift the sheets and position them on the ceiling. They should be aligned with the marked lines and 0.25 inches removed from the wall.
Then, use the drywall screws to screw the sheets to the ceiling.
There should be 8 inches of space between the screws along the edges and 12 inches through the field of the panel.
Screws should be long enough to penetrate the popcorn ceiling, so pay attention to how thick your panels are.
Work on one panel at a time. Only when the one panel is screwed to the ceiling and secured, move on to the next one.
To finish the expansion gap where the wall meets the ceiling, use tear-away beading.
Make sure that one edge of the bead should be tight to the wall and staple it to the edge of the drywall.
Space the staples, so there are about 8 inches between them.
5. Finishing Touches
Once the drywall panels are installed, mud the edge along the bead and along the joints and screw holes.
Finally, paint the drywall, pull the tear-way beading, and touch up paint if needed.
Covering A Popcorn Ceiling With Fabrics
Using fabric to cover the popcorn ceiling is the quickest fix and probably the cheapest one.
To do this, you should first attach hooks to the popcorn ceiling, either the adhesive ones or those that can be screwed in.
Then you can use a single large piece of fabric and attach it to the hooks to create a bundled look on your ceiling.
Alternatively, you can use multiple fabric panels and sew them together. However, this will require some sewing skills or help from a tailor.
With a certain kind of home decor, this can look really good and add a royal feel to the whole room.
Conclusion
The days when popcorn ceilings were fashionable are likely long gone. As people became aware of all the drawbacks , popcorn ceilings rapidly went out of style.
Nowadays, they’re mostly the relic of the housing boom of the second half of the past century.
Those who still have them in their homes mostly look for a way to remove them or at least get them out of the sight.
Luckily, you don’t have to necessarily break the bank to deal with a popcorn ceiling.
The techniques described above are fairly easy to perform and will keep you within the budget.
If you’re looking for a cheap way to cover popcorn ceiling, these are your best options. Of course, there are other ways to conceal the popcorn ceiling.
You can use ceiling tiles, a grid-plan system, or even install a drop ceiling. However, these methods require significantly more time, labor, and money.